Welcome to our guide on how to set up a Shoutcast Interent Radio Station.
First of all, you need a Shoutcast server to connect to, the server will distribute your audio feed to your listeners. Radio Services offer some very reliable and affordable Shoutcast servers and we can offer you custom solutions, take a look at our price plans here or get in touch with your specific requirements and we’ll get you a quote.
Once you have signed up and have a server, you will need to download two pieces of software. Both of them are completely free of charge. One of them is Winamp and the other one is the DSP plugin for Winamp.
Getting started – Downloading
First, download Winamp here. Once it is saved onto your PC, double click on it and install it on your PC, normally just follow the install process by just clicking ‘Next’ unless you want to save it somewhere specific.
Once installed, proceed to download the Winamp DSP plugin from here. Again, just follow through the install process, change any directory as you wish, but make sure that the DSP plugin is installed in the same directory as Winamp above.
Configuring
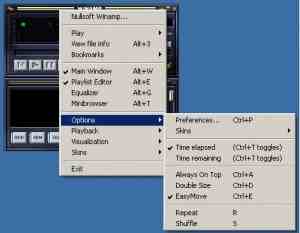
Now, open Winamp and right click on the top bar of the Winamp program and scroll down to Options, then select Preferences.
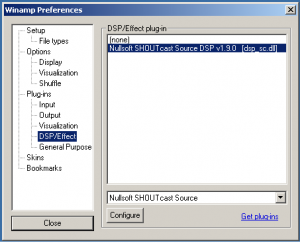
The Winamp ‘Preferences’ box will appear. In the left hand panel, select ‘DSP/Effect’ and in the left panel, select ‘Shoutcast……’ then press ‘Configure’.
This is the DSP plugin box and here we will input all our settings. We will start with the top tabs, from right to left.
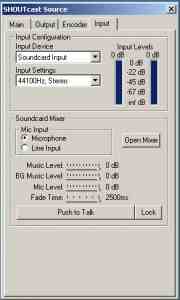
The furthest right tab is called ‘Input’ and here we tell Winamp whether to take the audio from the Winamp program itself or from your PC’s soundcard. This will depend greatly on how you will be broadcasting. Most people will be using some external audio equipment such as a mixer, etc… and you will therefore need to connect your mixer to your PC’s ‘Line In’ input. If this is your scenario, select ‘Soundcard Input’ as your Input Device, if you will be using Winamp to be your audio source, select ‘Winamp’ in this box. You may need to open your PC’s mixer to select ‘Line In’ volume under the Properties/Recording tab to make sure the volume is correctly set.
For ‘Input Settings’ you should select ’44100Hz, Stereo’ most of the time.
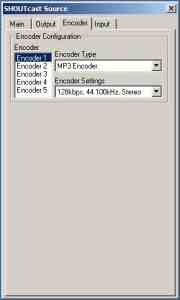
Now click on the next tab, ‘Encoder’ and select ‘Encoder 1′.
Here you need to select two things:
– The format of your broadcast, AAC+ (for mobile streaming) or MP3 (for standard streaming).
– The bitrate of your stream, as per your streaming server package purchased earlier. DO NOT broadcast at a higher bitrate or you are likely to get disconnected!
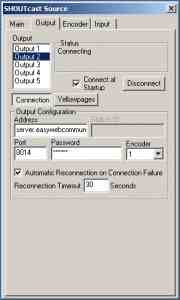
Now move onto the ‘Output’ tab to the left. Select ‘Output 1′.
Click on the ‘Connection’ box and enter the server name (as provided to you when you signed up), also enter the port number and the password. All this will have been in your ‘Welcome’ email when you signed up. You will also want to tick the ‘Automatic Reconnection’ and ‘Connect at Startup’ boxes.
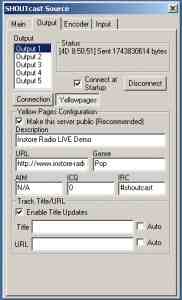
Now, click on ‘Yellowpages’ and enter your station name, website and any other info you would liek to appear on the Shoutcast directory page.
Finally, click on the ‘Connect’ button and you should see your DSP connect to out servers and start broadcasting!
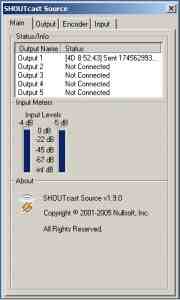
Click on the ‘Main’ tab (far left) and you should see ‘Encoder 1′ connected and sending data to our servers.
You are now live! You should now find another computer to log onto your new online radio station to listen in and verify that all is well.
If you have any problems setting up your Internet radio station (and you have a server with us) please get in touch by raising a support ticket. If you are not one of our clients, leave a comment below and we’ll still help you out!
Need a Shoutcast server to get your station online in just a few moments? Click here and see our Shoutcast streaming packages!